Monday, September 16, 2019

Points of sail on a hex grid part 3: the surprising conclusion

While I was poking around on Wikipedia looking for decent images of a compass rose for one of the first posts I wrote along these lines, I stumbled upon a strange and fortuitous factoid.  Way back in ancient times (well before the time period I'm trying to emulate with these sailing rules, but heck, in a fantasy world anything goes), the Greeks and Romans developed a system of 12 wind directions. 

Roman names in red, Greek names in blue


Normally I'd glance over this kind of trivia, and maybe vaguely remember it if it ever came up, or more likely forget it altogether.  But for a hex grid, this is PERFECT.  There are no repeating patterns that you have to remember, so no need to use extra markers.  Everything is either a hex-face-to-hex-face direction, or a "half-hex" direction like I used in the other hex grid systems. 

Now, these Greek and Roman names are pretty evocative, but ultimately meaningless or outright misleading (I would think Boreas would be due North, myself).  Wikipedia also lists the names for these directions as used by the Franks, and it's not super hard to translate those into English.  The only issue being that there are some directions that end up sounding weird to English ears, specifically Eastnorth, Eastsouth, Westnorth, and Westsouth.  The other hybrid directions (Northeast, Southeast, Southwest, and Northwest) also don't point directly in the directions a modern person would expect, but that's a lesser issue.

Without further ado, presented here is a 12 point wind system, using the same format as the previous posts.


Direction Vertical hexes Horizontal hexes
N A E/F
NE A/B F
EN B F/A
E B/C A
ES C A/B
SE C/D B
S D B/C
SW D/E C
WS E C/D
W E/F D
WN F D/E
NW F/A E

Sunday, September 15, 2019

Points of sail on a hex grid part 2

We went over the patterns of movement on a vertical hex grid to replicate the 32 directions of the compass rose.  Now we'll go over the patterns on a horizontal grid.  The patterns are going to be pretty much the same, just oriented differently.

First, we need to establish our directional notation.  Not entirely arbitrarily, I'll choose East as our main ("A") direction.


The patterns are all the same as on the vertical grid, just shifted 90 degrees.  This combined table lists them all for both grids.

Direction Vertical hexes Horizontal hexes
N A E/F
NbE 4A1B 2F1E
NNE 2A1B1A1B 5F1E
NEbN 1A1B F
NE 1A3B 1A3F
NEbE B 1A1F
ENE 5B1C 2A1F1A1F
EbN 2B1C 4A1F
E B/C A
EbS 2C1B 4A1B
ESE 5C1B 2A1B1A1B
SEbE C 1A1B
SE 1D3C 1A3B
SEbS 1D1C B
SSE 2D1C1D1C 5B1C
SbE 4D1C 2B1C
S D B/C
SbW 4D1E 2C1B
SSW 2D1E1D1E 5C1B
SWbS 1D1E C
SW 1D3E 1D3C
SWbW E 1D1C
WSW 5E1F 2D1C1D1C
WbS 2E1F 4D1C
W E/F D
WbN 2F1E 4D1E
WNW 5F1E 2D1E1D1E
NWbW F 1D1E
NW 1A3F 1D3E
NWbN 1A1F E
NNW 2A1F1A1F 5E1F
NbW 4A1F 2E1F

Saturday, September 14, 2019

Points of sail on a hex grid Part 1

I really truly recommend playing out ship chases and ship battles on a square grid.  It's just so much easier than all the weirdness hexes bring to a 32-point direction system.  However, I realize that pretty much everyone maps their game worlds in hexes, so ships need to be able to move on hex grids too.  I guess if you're bent on ignoring my recommendation for a square grid, you'll have the tools to run battles on hexes as well.

Before we start, we need to acknowledge that there are two main orientations of hex grids.

Vertical:


And Horizontal:


They're going to be somewhat related, but different enough that we'll start with the vertical orientation and move on the horizontal once the difficulties are already hammered out.

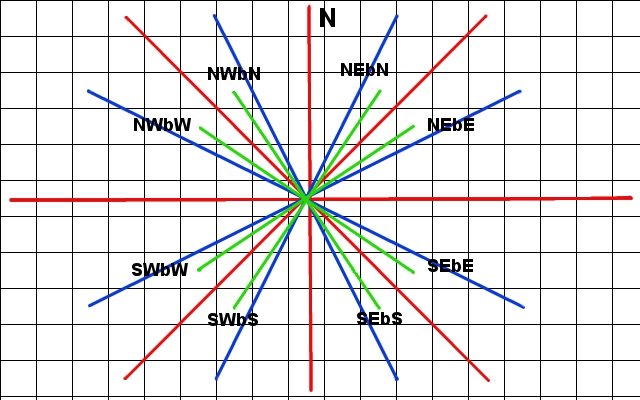
The next thing we need to do is establish a standard notation for direction.  I've decided to designate each direction with a letter, so that I can use numbers to represent the number of hexes moved in that direction.  It's a lot easier to say "4A1B" than "four hexes in the direction of grid north, then one hex 60 degrees clockwise".

So here is the standard notation for a vertical grid, with the black dot as the starting point.


North is obviously direction A.  Easy peasy.


Moving clockwise, North by East will be, as I said above, four hexes in direction A and one in direction B, or 4A1B.


North Northeast is a little weird.  The best way to keep moving in the proper direction is to move two hexes in direction A, one in B, one in A, and then one more in B before repeating the pattern.  In other words, 2A1B1A1B.


Northeast by North is even weirder.  We'll just call it 1A1B, but if you plot it out on the grid, it actually drifts ever so slightly east from this plot over time, but 1A1B is close enough and way simpler than a slightly more accurate plot.


Northeast is 1A3B (although I suppose you could go 3B1A, it works out the same).


Northeast by East isn't exactly direction B, but we would be crazy not to simplify things by using it.


East Northeast runs 5B1C.


East by North is 2B1C.


East could be 1B1C, but I'm going to go a different (possibly heretical) route.  Instead of staying strictly in the hex centers, I'm going to say you can alternate moving from hex center to the line between hexes as a one space move, and notate it as B/C.  (It's the same distance; measure it if you want.)  If a ship is currently on the line between hexes while traveling East, and fires at or is fired on by a ship to the north or south, add 1/2 of a hex worth of distance to the total range.


Further directions are mirror images of the preceding ones.

East by South - 2C1B

East Southeast - 5C1B

Southeast by East - C

Southeast - 1D3C

Southeast by South - 1D1C

South Southeast - 2D1C1D1C

South by East - 4D1C

South - D

South by West - 4D1E

South Southwest - 2D1E1D1E

Southwest by South - 1D1E

Southwest - 1D3E

Southwest by West - E

West Southwest - 5E1F

West by South - 2E1F

West - E/F

West by North - 2F1E

West Northwest - 5F1E

Northwest by West - F

Northwest - 1A3F

Northwest by North - 1A1F

North Northwest - 2A1F1A1F

North by West - 4A1F


And I'm going to end this post here.  I'll go over the horizontal orientation in the next post.

Friday, September 6, 2019

Using markers for tactical ship movement

Okay, everybody has a pretty good idea how to move in the cardinal and ordinal directions (we do it all the time with minis), and the half-wind directions aren't so hard to deal with, as long as you remember at the beginning of your turn whether you moved orthogonally or diagonally the last time.  But the quarter-wind directions are a little weird.  Did you move two spaces last time and still need to move another one orthogonally before moving diagonally, or did you move three last time and now you move diagonally?  This all gets worse as more and more ships are involved.  It's bad enough when the PCs in their little brig are maneuvering for position against a single pirate ship, but when they're leading the Grand Navy of Poraquis into battle against the Combined Fleet of the Pirate Kings of Amaray, it's going to get more than a little crazy.

The solution is to use a marker unique to each vessel to show where it is going.  For example, we have these two ships, one red and one purple. 


The red one is going to move on a bearing of Northeast by East (two squares Northeast, then one East), while the purple one is moving East by North (three squares East, then one square Northeast).


We'll assume that each one has three spaces of movement per turn, so neither one will move this full distance before their turn ends.  How do we make sure they move at the proper bearing over the course of several turns?  We'll count out the full number of spaces we use as an index, and place a marker on it.


Now we move each ship three spaces worth of movement. We still know each ship's proper bearing because of the marker.


The next turn, during their movement, each ship comes to its marker.  Assuming neither one changes its heading, count out the spaces again, place the marker in the new space, and finish movement.


And we can keep doing this until they move off the map.


Markers can also be used to keep track of vessels moving in less weird directions, just to be sure everything is going where it's supposed to be going when there are a lot of ships moving around on the table.

I hope this was clear enough.  Feel free to ask questions; I'll clarify the best I can.

ADDENDUM: Of course, these black lines won't be on the tabletop map.  They're only here for illustration.  As long as each ship moves as directly as possible towards its unique marker, it won't matter much if one takes a diagonal move a little early.  In fact, a little leeway as to exactly which path the ship takes to its index marker is recommended; each point on the compass rose accounts for 11.25 degrees of arc, so there's some variation built in already.


Tuesday, September 3, 2019

Points of sail on a square grid

Normally for gaming, I prefer hex grids for tactical movement, but with a 32 point compass rose as the main guide for which ways you can sail, a square grid is so much easier.  Even if you have to remember to multiply movement in the diagonal direction by 1 1/2.

I think everyone understands the cardinal directions pretty well.


And everyone knows the ordinal directions too.


So the half winds aren't that hard to work out.  To go North Northwest, you travel one square North, then one square Northwest.  Same goes with all the other directions here; alternate one square orthogonally, then one square diagonally, going in the orthogonal and diagonal directions implied in the half wind's name.


The quarter winds get a little trickier.   First of all, they come in two varieties: the ones between a cardinal direction and a half wind, and the ones that come between an ordinal direction and a half wind.  For the first group, just one point off the cardinal winds, ships traveling in those directions will move three squares in the main cardinal direction and one square diagonally.  So a ship moving East by South would go three squares East and one square Southeast before repeating the pattern.


 For the quarter winds that are one point off of an ordinal direction, you would travel two squares diagonally and one square orthogonally.  Moving Southwest by South would have you going two squares Southwest then one square South before repeating the pattern.


 And because these quarter winds are a little bit tricky, it might not be a bad idea to use a temporary marker to show where the vessel is headed. I'll write up another post in the next few days to illustrate this.

So now we have the full 32 point compass rose for ship movement.  This opens up some interesting tactical situations in the game, given that some sailing vessels are able to sail closer into the wind than others, and some are much faster downwind than upwind.  Since sailing into the wind requires a very precise balance of sails and rigging, as they are damaged, the vessel is forced to turn away from the wind more and more, giving its opponent in a sea battle more options to flee or to board.  These are the kinds of situations I hope to facilitate more by developing these fiddly rules, and I hope when all is said and done they aren't too fiddly to actually use at the table.